In this blog post, we will explore CDKTF, testing out its ease of use with a non-AWS cloud and with a generic Terraform module. Specifically, we will see what it looks like to deploy a Yugabyte cluster to Azure using CDKTF. This post will start with an introduction to CDKTF, followed by a tutorial, and conclude with an overall evaluation of CDKTF.
Introduction to CDKTF
When AWS released their Cloud Development Kit (CDK) for provisioning AWS resources programmatically, the benefits were obvious and made DevOps engineers wish there was something similar for other clouds such as Azure and GCP. And understandably so – being able to deploy infrastructure as code using familiar languages such as Python, Javascript, Python, and C# applies infrastructure as code (IaC) principles on a whole new level.
Enter CDKTF – Cloud Development Kit for Terraform. The niche is clear: CDKTF is not just language-agnostic like CDK, but is also cloud-agnostic like Terraform. Indeed, we can use any Terraform provider or module within CDKTF.
The docs say it best:
Cloud Development Kit for Terraform (CDKTF) allows you to use familiar programming languages to define cloud infrastructure and provision it through HashiCorp Terraform. This gives you access to the entire Terraform ecosystem without learning HashiCorp Configuration Language (HCL) and lets you leverage the power of your existing toolchain for testing, dependency management, etc.
CDKTF docs
How CDKTF Works
In regard to high-level architecture, this diagram helps quite a bit:
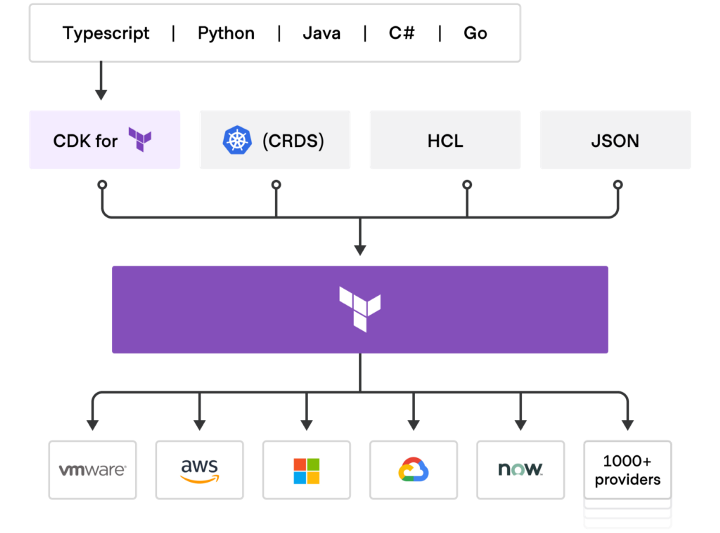
As you can see, CDKTF is basically just another API to access any Terraform provider or module that’s out there. In fact, you can even mix and match: if you want to use CDKTF with HCL or JSON there are supported processes to do that as well.
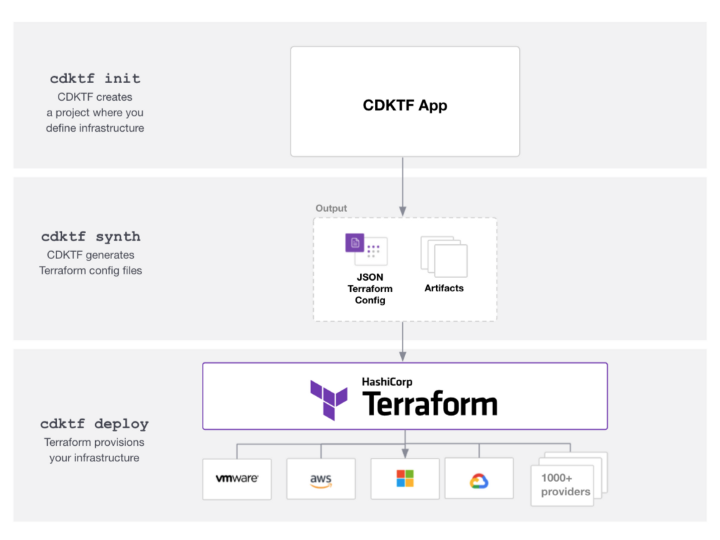
The development process looks something like this: How it works is that (1) you start with a codebase in your chosen programming language, optionally starting from templated code using the cdktf CLI command cdktf init. (2) After writing out your app, you generate Terraform config files using the cdktf synth command. (3) At this point you have fully functioning Terraform code that you can deploy using cdktf deploy or if you want, using Terraform CLI (i.e., terraform apply).
Tutorial: Deploy Yugabyte to Azure with CDKTF
For this post, we will use the CDKTF AzureRM provider. CDKTF Providers are similar to a Terraform provider in function and stand in between Terraform core with the target API (i.e., the Cloud Provider’s API).

Why Azure? Well, with just straight CDK, we could build resources on AWS, and moreover, it seems like it’s easier to find guides for AWS on CDKTF already (e.g., here). This being the case, let’s do something that requires CDKTF in particular by targeting a different cloud provider. Again, one main use case for CDKTF, as opposed to just CDK, is that it works on other clouds than just AWS!
There are several pre-built CDKTF providers for an extra level of abstraction (full list here), and you can also use any Terraform provider by importing the Terraform provider and then using CDKTF to generate a JSON Terraform configuration file which can then be used. For this demo though, we will be using the CDKTF Azure Provider along with the Yugabyte DB Cluster module.
We will be mostly following this guide to start, but with adjusted steps in order to use CDKTF AzureRM Provider instead of AWS Provider. We will also be using the Yugabyte Terraform module to test out CDKTF’s compatibility with Terraform Modules.
You can find the finished code base at: https://github.com/Anant/example-cdktf-yugabyte-azure
By the way: this post is a bit over the top in the number of steps it records, even to the point of being pedantic. This is purposeful to some degree, however. As I will comment on later, one major shortcoming of CDKTF is the lack of documentation and examples. Hopefully, this will prove to be useful for at least somebody.
Prereqs
- Python v3.7 and pipenv v2021.5.29
- Terraform CLI. This is what the CDKTF CLI will be running under the hood.
- Azure CLI. This is a prerequisite in general for using the AzureRM Terraform provider. After you install the CLI, make sure to run
az loginto authenticate to your Azure account. - CDKTF CLI
Initialize CDKTF Project
CDKTF CLI can be used to generate your boilerplate code, which is what we will do here. We will be using Python code for this example, so we will use something like this:
mkdir cdktf-azure-demo
cd cdktf-azure-demo/
cdktf init --template=python --local
This will give us the main CDKTF configuration files as well as a main.py file to start coding on.
Setup CDKTF Azure Provider
Next, we need to add and set up the CDKTF AzureRM Provider.
First, add the provider using CDKTF CLI. We will use version 2.0 in order to be compatible with the Yugabyte module that we’re adding later.
cdktf provider add "azurerm@~>2.0"
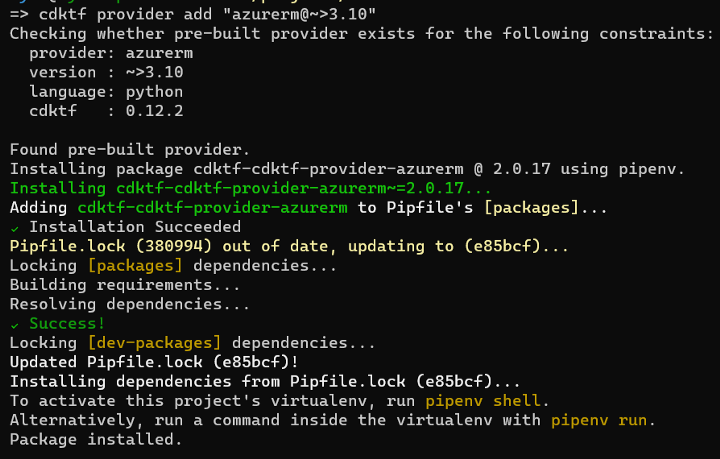
We can see that this command made changes to our Pipfile as well:
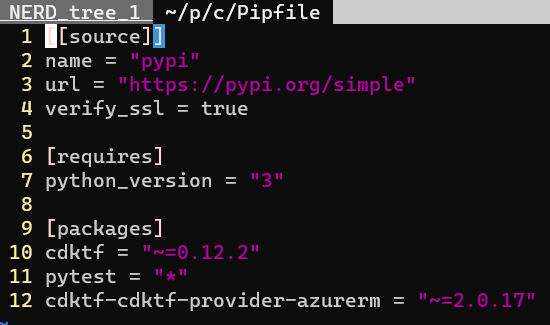
Add Azure Provider to cdktf.json
The preceding steps added the Azure provider to our pipenv, but as far as I can tell, we still need to add it to this specific project. For that, we will need to add it to our cdktf.json file. At this point our cdktf.json file should look something like this:
{
  "language": "python",
  "app": "pipenv run python main.py",
  "projectId": "your-project-id",
  "sendCrashReports": "true",
  "terraformProviders": ["azurerm@~> 2.0"],
  "terraformModules": [],
  "codeMakerOutput": "imports",
  "context": {
    "excludeStackIdFromLogicalIds": "true",
    "allowSepCharsInLogicalIds": "true"
  }
}
Generate CDKTF Constructs for Azure Provider
cdktf getThis won’t output much, but should give a generic success message:

We can see the downloaded cdktf provider is now in the project directory’s imports folder.
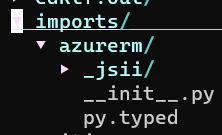
Import Azure Classes into CDKTF Python code
We can now import the AzureRM classes from the newly generated folder in our main.py file and write some Python. For this, we will start simple, and go from there. You can find some sample code in the terraform-cdk repo that will get us started. Mine looks like this:
#!/usr/bin/env python
from constructs import Construct
from cdktf import App, TerraformStack, TerraformOutput, Token
from imports.azurerm import AzurermProvider, ResourceGroup, VirtualNetwork

class MyStack(TerraformStack):
  def __init__(self, scope: Construct, ns: str):
    super().__init__(scope, ns)

## define resources here
    location="Southeast Asia"
    address_space=["10.12.0.0/27"]
    resource_group_name="yugabyte-rg"
    tag = {
      "ENV": "Dev",
      "PROJECT": "AZ_TF.Yugabyte"
    }
    features = {}

    AzurermProvider(self, "Azurerm",
      features=features
    )
    resource_group = ResourceGroup(self, 'yugabyte-rg',
      name=resource_group_name,
      location = location,
      tags = tag
      )
    example_vnet = VirtualNetwork(self, 'example_vnet',
      depends_on =[resource_group],
      name="example_vnet",
	  location=location,
      address_space=address_space,
	  resource_group_name=Token().as_string(resource_group.name),
      tags = tag
      )
    TerraformOutput(self, 'vnet_id',
      value=example_vnet.id
      )


app = App()
MyStack(app, "cdktf-azure-demo")

app.synth()
Nothing fancy so far, just creates a resource group and a Virtual network.
Test Deploy to Azure
Run cdktf deploy and it should start. Select “Approve” and your resources should be created.
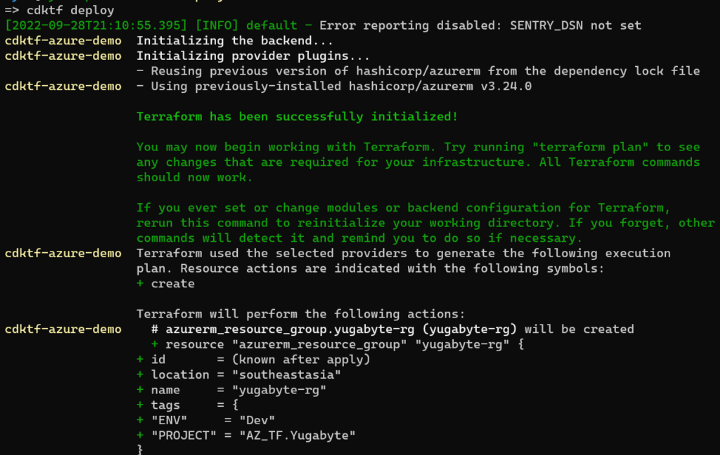
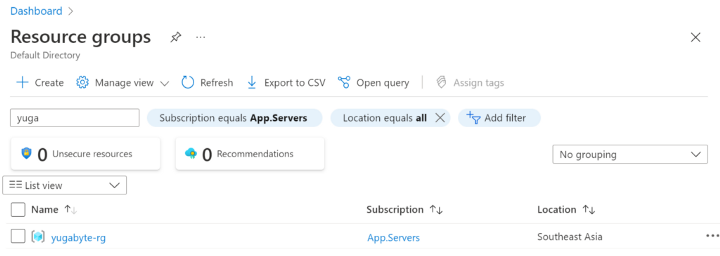
You can check in Azure under “Resource Groups” to make sure it got created:
Cleanup resources
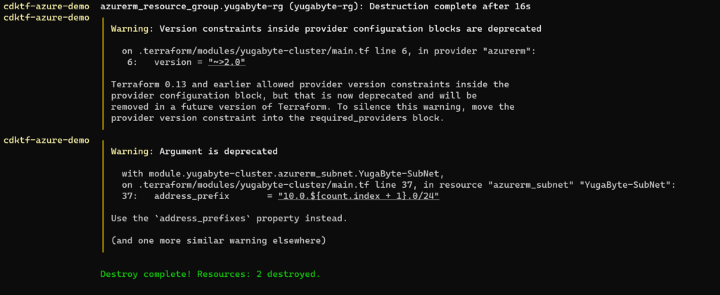
This was enough to confirm that everything is wired up between CDKTF, Terraform core, and Azure. Now we’re ready to also deploy a Yugabyte cluster. Let’s clean up first though before going any further:
cdktf destroy
Configuring the Yugabyte-Azure Module for CDKTF
Now that Terraform is successfully connecting to Azure, let’s deploy Yugabyte. We chose Yugabyte for this demo since it has a module for Terraform already, but at the same time is not a widely used module (it is not even in the Terraform registry) and so we should hopefully be able to get a feel for whether CDKTF really works with any arbitrary Terraform module that we want to use. We will use the CDKTF Modules API to get this working.
Now to be clear, often this kind of configuration is done in Ansible rather than Terraform. The general rule of thumb is to provision infrastructure using Terraform and manage configuration (installation, set config files, etc) using Ansible.
However, one difference that CDK-TF has over straight Terraform is that it allows you to write pure Python, which could be enough of an advantage to put both provisioning and configuration on a single tool. Let’s give it a try.
Add Yugabyte module to cdktf.json
First, we need to add the module to our cdktf.json file, under terraformModules. It should now look something like this:
{
  "language": "python",
  "app": "pipenv run python main.py",
  "projectId": "your-project-id",
  "sendCrashReports": "true",
  "terraformProviders": ["azurerm@~> 2.0"],
  "terraformModules": [{
    "name": "terraform_azure_yugabyte",
    "source": "github.com/yugabyte/terraform-azure-yugabyte.git"
  }],
  "codeMakerOutput": "imports",
  "context": {
    "excludeStackIdFromLogicalIds": "true",
    "allowSepCharsInLogicalIds": "true"
  }
}
It appears that you can use any value for the "name" key that you want, but whatever you use will determine the class import in your python code.
We will then use the same command that we did before to generate bindings, but this time for the Yugabyte module.
cdktf getUpdate main.py file
The Yugabyte Azure module documentation for using Vanilla Terraform gives the variables that we would need to set if using this module in Terraform arguments. We take those variables and instead of passing them into the module definition in the .tf file, we pass them into the YugabyteCluster class instance.
yugabyte_cluster = TerraformAzureYugabyte(self, "yugabyte-cluster",
	ssh_private_key = os.environ["PATH_TO_SSH_PRIVATE_KEY_FILE"],
	ssh_public_key =  os.environ["PATH_TO_SSH_PUBLIC_KEY_FILE"],
	ssh_user = "SSH_USER_NAME",
	## The region name where the nodes should be spawned.
	region_name = location,
	## The name of resource group in which all Azure resource will be created.
	resource_group = "test-yugabyte",
	## Replication factor.
	replication_factor = "3",
	## The number of nodes in the cluster, this cannot be lower than the replication factor.
	node_count = "3",
)
How did I know this is the way to do it? And how did I know that the class to import was called TerraformAzureYugabyte in the first place?
Well…to be honest, it was just a guess. Maybe it’s documented somewhere, but if so, I couldn’t find it. For the classname TerraformAzureYugabyte, I used the exact name that I set in the cdktf.json for the module (terraform_azure_yugabyte), but in camel case instead of snake case.
For what keyword args we are to pass into the TerraformAzureYugabyte instead, I basically just copied and pasted in the HCL variables, adding commas at the end of lines so that it works as keyword arg, and replacing some of their sample strings with variables that we already set when running Azure stuff.
More on this later, but again, documentation seems to be a weak spot for the CDKTF project overall.
Deploy Yugabyte to Azure with CDKTF
Anyways, continuing on: since we are reading from env vars in our Python code, we will need to set those in the terminal:
export PATH_TO_SSH_PRIVATE_KEY_FILE=<your path>
export PATH_TO_SSH_PUBLIC_KEY_FILE=<your path>
In our case, since the Yugabyte module sets up the infrastructure as well, we also need to make sure to delete the resource definitions we made before for the resource group and virtual network. For the final result of what the code looks like, see our sample repo.
Finally, deploy using cdktf deploy. As before, first, it will “synthesize” (generate Terraform config files from your python code):

Then it will come up with a plan (similar to terraform plan) and ask for your approval:
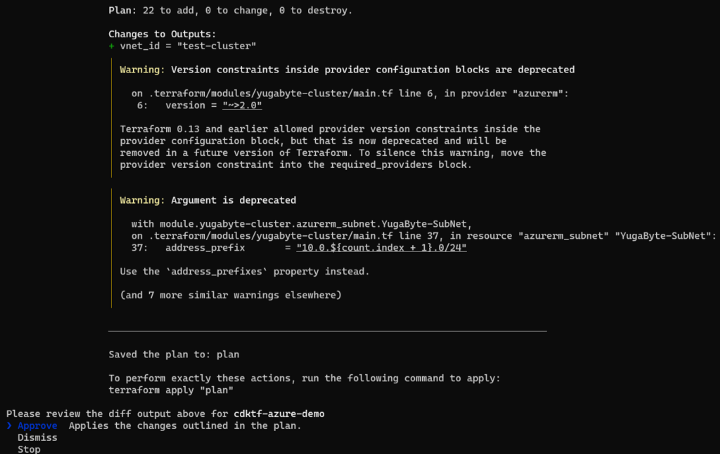
Looking good!
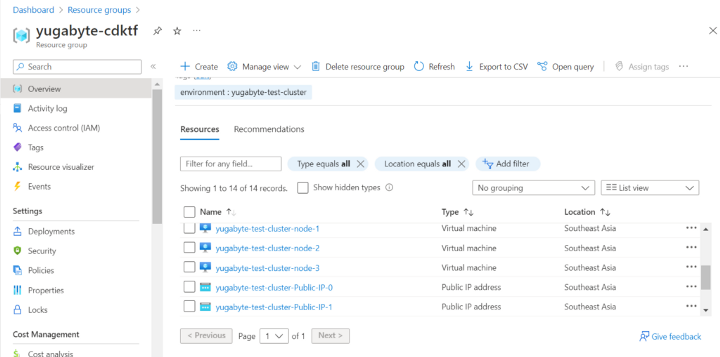
In Azure, you should be able to see a three-node cluster in your resource group (based on the resource group configured in your python code), complete with a security group, Public IPs, and everything else that the Yugabyte module configures for you:
Test CDKTF Compatibility with Terraform CLI
CDKTF can also generate tf.json files that we can use with the Terraform cli. We could generate these files using cdktf synth, but this is unnecessary in our case since we already ran cdktf deploy, which generates these files just as well.
First, navigate to the folder for your particular CDKTF stack.
cd ./cdktf.out/stacks/cdktf-azure-demo
In this folder, we see the cdk.tf.json file that contains the Terraform configuration for our setup (written according to Terraform JSON specs), as well as the .terraform directory that contains other Terraform metafiles.

All of these files and concepts should be fairly familiar to you if you have used regular vanilla Terraform in the past.
With this .tf.json file, you can run arbitrary Terraform CLI commands. For example, here is the output of terraform plan:
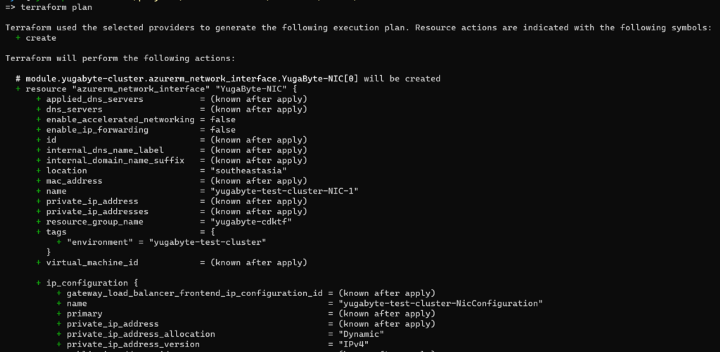
Or you can deploy the code using terraform apply. This would have the same net effect as doing cdktf deploy from the project’s main directory, but using standard Terraform procedures. For example, in the screenshot below, you can see that the terraform apply command runs the plan and then prompts for whether to create the resources, just like normal terraform:
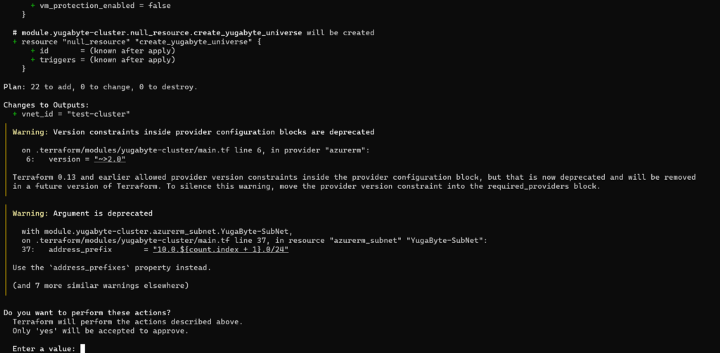
In our case, we don’t need to do this, since we already deployed our infrastructure using cdktf deploy. However, we can benefit from the Terraform CLI compatibility for accessing other information about our Terraform deployed infrastructure, such as to SSH into our nodes.
In our main.py we specified that the user would be yugabyte, so we can use that user to ssh in. You can get the ip address from the Azure GUI, but who wants to do that? We can use the terraform files that CDKTF automatically generated by doing something like this:
cd ./cdktf.out/stacks/cdktf-azure-demo
terraform state show module.yugabyte-cluster.azurerm_public_ip.YugaByte_Public_IP[0]

In this way, we can access all kinds of terraform internals. For example, we can use the information from Terraform deployment metadata to SSH into the provisioned node. The Yugabyte module relied on the PATH_TO_SSH_PRIVATE_KEY_FILE env var to interact with your VMs before, so you should be able to use that same env var to ssh in now.
ssh yugabyte@20.198.220.125 -i $PATH_TO_SSH_PRIVATE_KEY_FILECleanup Yugabyte cluster in Azure with CDKTF
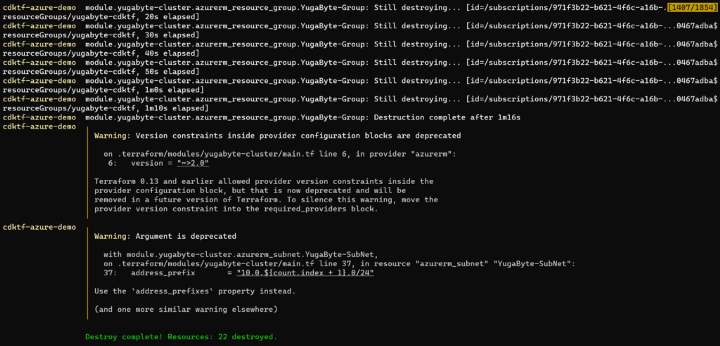
Then, of course, run cdktf destroy to tear it all down:
Some concluding thoughts on CDKTF
Overall, CDKTF is a fun tool to try out. There is clearly a lot of potential here and many reasons why someone would want to try it out. Being able to make use of the entire Terraform ecosystem, but with Python or Java instead of config files opens up a whole set of new possibilities.
At the same time, there are a couple of key concerns that make me hesitant to recommend CDKTF without reservations. Please bear in mind that I am speaking only from my limited experience, but these are the two concerns that jumped out at me: (1) documentation and (2) overall community support.
Concern about Documentation
First, documentation. Perhaps because it is a relatively newer tool, documentation and guides are a bit lacking. Relatively speaking, there does seem to be more examples and documentation given for AWS and Javascript as opposed to other clouds or languages (e.g., the Mozilla Pocket project). Unfortunately, if you wanted to use straight AWS, it might make sense to just use vanilla CDK rather than CDKTF. And if you want to Javascript for DevOps…well, that’s your prerogative, but at the very least we can agree that often we would want to use some other programming language instead like Python, and would want that to be documented as well.
To make matters worse, the Terraform modules can often be under-documented as well. In such cases, sometimes the best (or only) option is to do some source code diving. While this problem is not unique to this tool by any means, this is particularly a concern for CDKTF, where a key selling point is to have a language-agnostic abstraction over your Terraform code.
This kind of defeats the purpose of one of the advertised benefits of using CDKTF, namely that you don’t have to learn HashiCorp Configuration Language (HCL). You will have to learn it anyways if you use any modules or any Terraform provider that hasn’t been ported into a CDKTF provider (of which there are plenty). And then you have to translate that into Python (or whatever language you chose) on top of that, thereby creating just one more way for things to go wrong.
Hopefully, this project will become better documented in time.
Concern about Community and Support
A second concern is related to the overall community and support surrounding CDKTF. Overall, my impression at this point at least is that this is a bigger issue potentially. In fact, a lack of a strong community, which goes hand in hand with the lack of adoption in general, can often be both a cause and effect of under-documented projects.
At the time of writing, the Terraform-CDK repo in Github has just a bit less than four thousand stars and CDK (the parent project) has over nine thousand stars, which is pretty decent actually. But there just doesn’t seem to be enough activity, enough example code, or enough of a thriving community to the point where I would be able to confidently recommend building a platform’s entire architecture on it for most projects.
Potential Use Cases
That said, there are still use cases where I could see CDKTF being worth consideration. One example is if your project has some fairly unique deployment needs where the flexibility of a full-on programming language is a better fit than HCL files. For instance, perhaps if your deployment code will need to have a lot of dynamic variables, including perhaps calculation or other flow-control operations, then being able to do that in a programming language like Python could make a lot of sense.
Alternatives
Depending on your use case, there are other alternatives that are worth considering. Depending on how much abstraction makes sense for your project, you might consider using tools such as:
- python-terraform (a Python wrapper around the Terraform CLI)
- Pulumi (I don’t have experience with it, but seems similar in concept to CDKTF in that you can use various programming languages to employ architecture to your choice of cloud)
- CDK8s (CDK for Kubernetes)
- Or of course, just make some Bash or Python script wrappers around your regular Terraform code

